Time needed
45 min
What you need
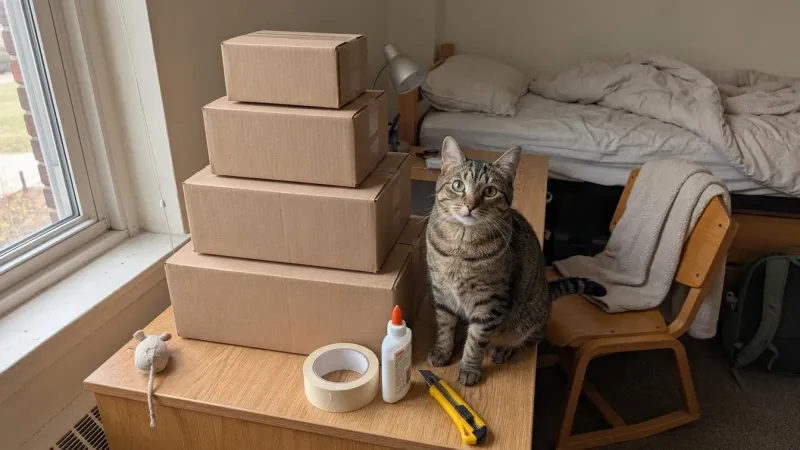
- 3 to 4 clean double-walled corrugated moving boxes (graduated sizes)
- 3 to 4 heavy textbooks or water jugs (for base ballast)
- Non-toxic white school glue or wide paper masking tape
- Leftover cardboard tubes or extra corrugated scraps (for corner posts)
- Old clean t-shirt or fleece scrap (for bedding)
Tools
- Box cutter or utility knife
- Ruler or measuring tape
- Pencil or marker
- Metal spoon (for smoothing cut edges)
You can build a sturdy, multi-level DIY cardboard cat tree in under an hour of active assembly (plus drying time if using glue) using free shipping boxes and basic household tape or non-toxic glue. When you live in a dorm, shared apartment, or temporary rental, buying bulky wood-and-carpet cat furniture makes little sense for your wallet or your next moving day.
By reinforcing double-walled moving boxes from the inside and anchoring the base with heavy textbooks, you get a safe climbing tower that costs nothing, weighs next to nothing, and flattens right into the recycling bin when your lease ends.
- 1
Gather Four Double-Walled Moving Boxes
Collect three to four clean, dry shipping or moving boxes in graduated sizes—such as one large 18-by-18-inch base box, two medium 14-inch boxes, and one smaller 12-inch top box. Check campus mailrooms, grocery stores, or bookstore recycling bins for free boxes stamped with a heavy-duty corrugated rating. Avoid boxes that held raw meat, harsh cleaning chemicals, or scented detergent, as lingering residues can irritate your cat's paws and nose.
- 2
Fold Top Flaps Inward for Double Walls
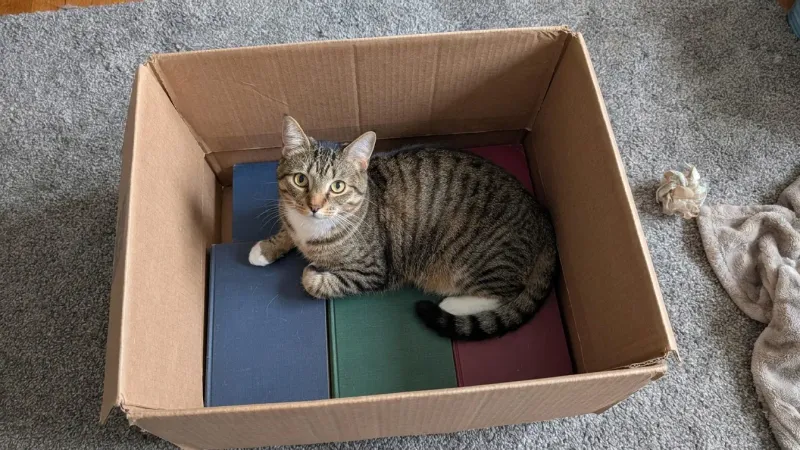
Remove every metal staple and loose piece of plastic tape from all boxes. On your large base box, fold the four top flaps straight down into the interior against the side walls instead of cutting them off. Make a clean 1.5-inch vertical slice through the corner folds if needed so the flaps lie flat against the inner walls, doubling the cardboard thickness and preventing the roof from caving in when your cat jumps onto the first ledge.
- 3
Anchor the Base With Heavy Textbooks
Set the large base box bottom-side down with its bottom flaps taped securely shut on the outside and its top flaps folded inward. Stack three or four heavy college textbooks, brick-wrapped towels, or unopened gallon water jugs flat across the interior bottom floor of the base box before sealing the top, or load them through the side doorway afterward. Adding at least 10 to 15 pounds of low-center weight keeps the entire tower from tipping over when an energetic cat launches off the top tier.
- 4
Cut Round Doorways and Peek Holes
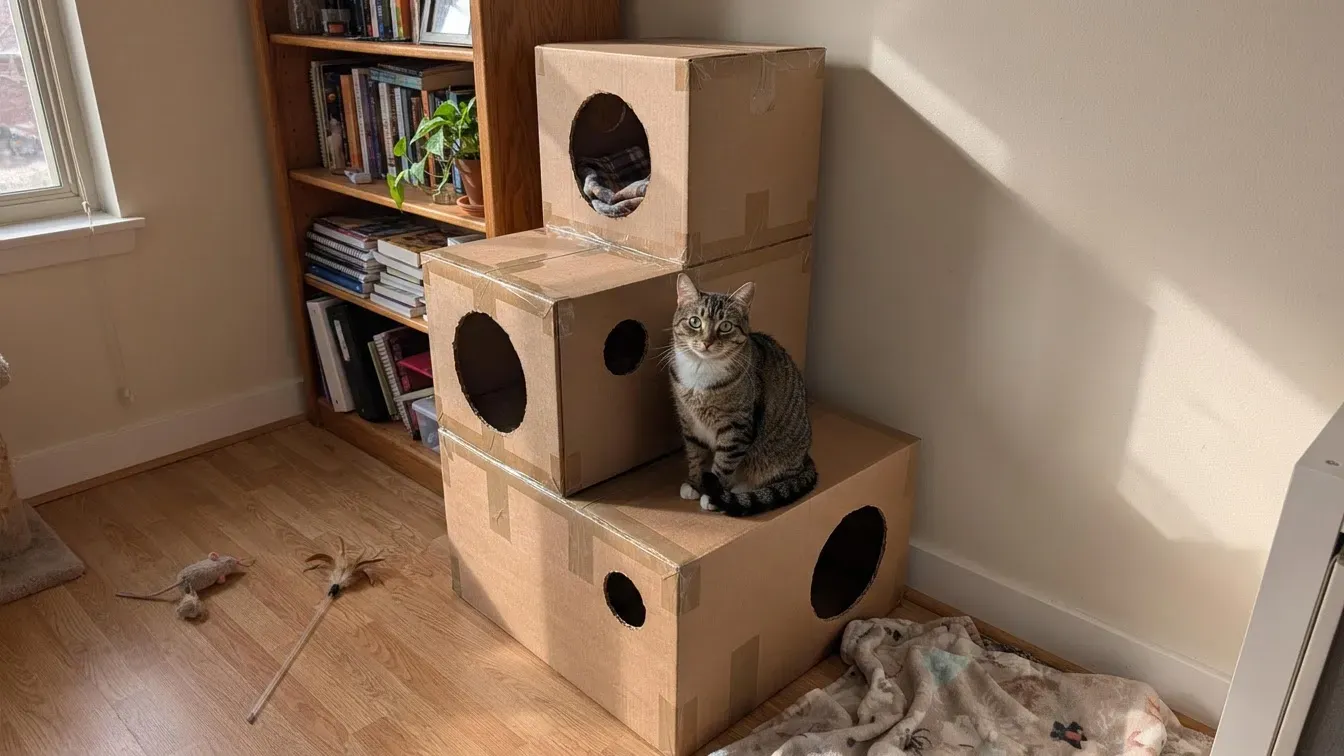
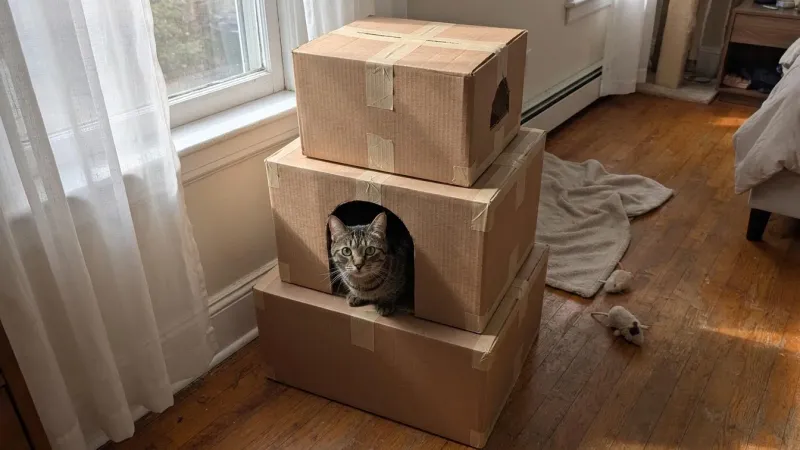
Use a sharp box cutter or utility knife on a protected surface to carve arched doorways at least 7 to 8 inches wide in the front and side walls of each box. Cut two or three smaller peek holes higher up—either under 1.5 inches wide so only a paw fits through, or at least 6 to 7 inches wide so your cat's head cannot get wedged inside—so your cat can bat at toys from within. Rub the cut cardboard edges firmly with the side of a metal spoon or a scrap piece of cardboard to smooth down sharp paper fibers.
- 5
Reinforce Interior Corners With Cardboard Tubes
If you have leftover wrapping paper tubes, paper towel rolls, or extra strips of corrugated cardboard folded into tight triangles, wedge them vertically into the inside corners of the bottom and middle boxes. Secure these internal pillars with strips of non-toxic white school glue or paper masking tape. Internal corner posts transfer your cat's weight straight down to the floor so upper stories never sag.
- 6
Stack and Offset the Upper Levels
Set the medium box on top of the base box, offsetting it slightly off-center so your cat has a clear 4-to-5-inch landing ledge on one side while keeping the center of gravity well inside the base footprint. Trace the outline of the upper box onto the roof of the lower box, apply a generous spiral of non-toxic white glue or double-sided paper tape, and press the boxes together firmly. Repeat with your smallest box on top, reaching through the 7-to-8-inch front doorways to press or weigh down the interior ceiling against the upper box's floor, or weighing the upper box from the top while the glue seams dry.
- 7
Secure Exterior Seams and Test Stability
Wrap two continuous bands of wide paper masking tape or kraft packing tape around the joints where each upper box meets the lower roof, pressing the tape smooth so no sticky edges remain exposed to fur. Before introducing your cat, push firmly against the top tier from all four sides to verify the base stays planted. If you ever want a permanent build later, check out how to build a sturdy DIY cat tree on a budget.
Safety Tips and Weight Limits for Cardboard Towers
Cardboard towers work best for kittens and average-sized adult cats under 12 pounds. If you share your room with a larger breed like a Maine Coon or a senior cat with stiff joints, cardboard panels can buckle under sudden leaps; consider a sturdy DIY cat tree for large heavy cats made with solid framing instead.
- Remove all hazards: Strip away every metal shipping staple, plastic air pillow, and loose strip of packing tape before letting your cat explore, as swallowed plastic or string causes dangerous intestinal blockages.
- Choose safe adhesives: Stick to non-toxic white school glue, plain flour-and-water paste, or standard paper masking tape. Avoid toxic solvent glues and keep wet hot glue well away from curious paws.
- Watch for wear: Replace frayed or soggy panels immediately, and call your veterinarian right away if you notice your cat chewing and swallowing chunks of cardboard rather than simply shredding it.
Easy Zero-Cost Upgrades and Moving-Day Breakdown
You can make this free tower even more inviting without spending a cent. Tuck an old, unwashed t-shirt or fleece sweatshirt inside the bottom cubby so your cat smells your familiar scent in a new dorm or apartment, and glue leftover corrugated cardboard strips vertically along one outer wall as a built-in scratcher.
When the semester ends or you pack up for a new place, skip the hassle of hauling worn furniture down narrow stairs. Simply pull out your textbooks, slice the masking tape seams, flatten the corrugated panels, and drop the clean cardboard straight into your building's recycling bin.
With a few free moving boxes, heavy textbooks, and basic masking tape, you can give your cat vertical territory and cozy hiding spots without spending a dollar. Keep the tower in a dry corner away from water bowls, inspect the tape seams weekly, and enjoy an easy, zero-guilt cleanup when moving day arrives.
Sources: International Cat Care · ASPCA
Frequently asked questions
Is cardboard safe for cats to scratch and chew?
Plain, unpainted corrugated cardboard is safe for cats to scratch and shred. Remove all metal staples, plastic tape, and glossy ink labels beforehand. If your cat swallows large pieces of cardboard rather than spitting them out, remove the tower and consult your veterinarian.
What kind of glue is safe for a DIY cardboard cat tree?
Use non-toxic white PVA school glue, plain flour-and-water paste, or paper masking tape. Avoid strong chemical adhesives, rubber cement, or solvent-based glues that release fumes, and let all glued joints dry completely before letting your cat climb.
How do you keep a cardboard cat tower from tipping over?
Always use the widest, heaviest box on the bottom and place 10 to 15 pounds of flat textbooks or water jugs inside the base floor. Offsetting upper boxes slightly while keeping the center of gravity well inside the base footprint also keeps your cat's weight balanced.
How long does a cardboard box cat tree last?
A well-reinforced cardboard cat tree typically lasts two to six months, depending on how vigorously your cat scratches and leaps on it. Because the materials are free, you can easily swap out worn top boxes or recycle the whole structure when moving.

Nathan Brooks
Nathan Brooks runs Farmingzoom to help loving pet owners create safe, enriching homes for their animals. He cares deeply about responsible pet care and focuses on making everyday decisions simpler for fellow owners.…