Time needed
3 h
What you need
- One 4x4-foot sheet of 3/4-inch untreated plywood
- Two 8-foot untreated 4x4 pine or spruce posts (a single 96-inch post leaves zero margin for kerf loss and squaring factory ends)
- 100 feet of 3/8-inch natural untreated sisal rope (covers the 36-inch main post; buy 220–250 feet total if wrapping all three posts)
- 1 square yard of low-pile carpet remnant or heavy fleece
- Box of 3-inch coarse-thread wood screws (plus 1-1/2-inch wood screws or metal corner brackets for mounting platforms from underneath)
- 1/2-inch or 9/16-inch heavy-duty upholstery staples for carpet (or 3/8-inch staples for thin fleece)
- Non-toxic wood glue (PVA)
- 120-grit sandpaper
Tools
- Circular saw or jigsaw
- Cordless drill with drill bits and countersink bit
- Heavy-duty staple gun
- Rubber mallet
- Tape measure and pencil
- Utility knife
- Safety glasses and dust mask
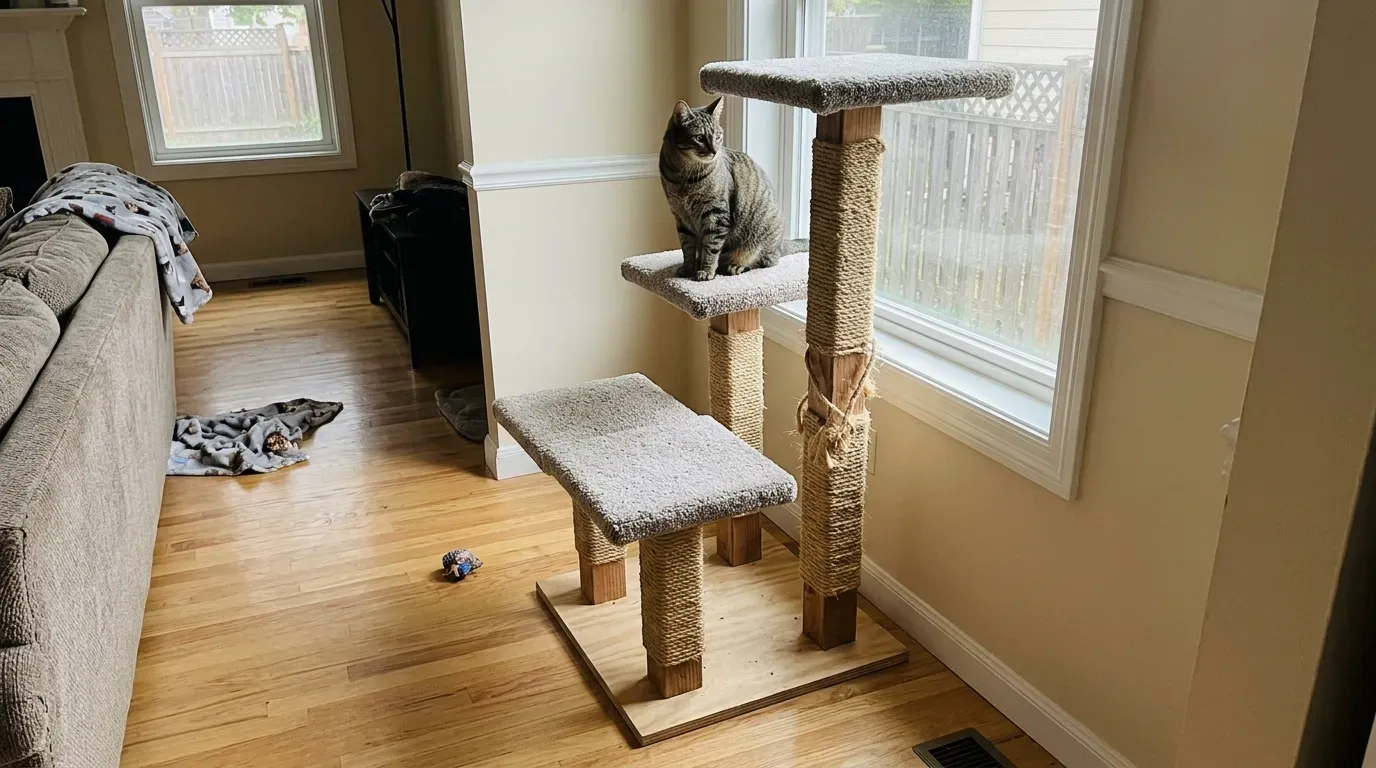
You can build a sturdy, wobble-free DIY cat tree in a single afternoon using standard hardware store plywood, untreated 4x4 posts, and natural sisal rope. Store-bought towers often rely on thin particleboard and hollow cardboard tubes that loosen or tip when energetic cats leap onto them.
By building your own tower, you control the footprint, platform thickness, and material safety while keeping costs well below commercial multi-level trees. This beginner-friendly guide walks you through exact board measurements, wrapping scratching posts tightly, and anchoring every joint so your cat has a safe place to climb, scratch, and nap.
- 1
Cut the plywood base and platforms
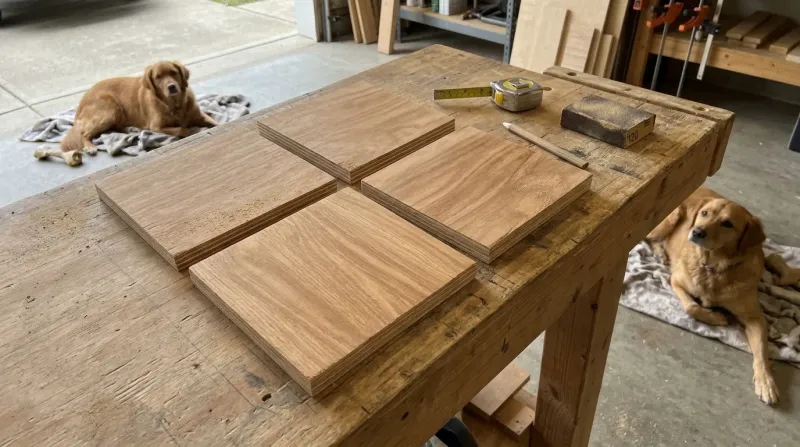
Measure and cut your 3/4-inch plywood sheet into four pieces using a circular saw or jigsaw. Cut one 24-by-24-inch square for the heavy bottom base, one 16-by-16-inch middle perch, one 14-by-14-inch top bed platform, and one 12-by-12-inch step platform. Sand every edge and corner with 120-grit sandpaper until completely smooth so no splinters remain.
- 2
Cut the 4x4 wooden support posts
Cut your untreated 4x4 lumber into three vertical posts of staggered heights: one 36-inch main post, one 24-inch middle post, and one 14-inch short step post. Make sure your cuts are completely square and flat on both ends. Uneven post ends are the main reason homemade cat towers wobble once assembled.
- 3
Pre-drill and attach posts to the base
Mark the positions for your three posts on the 24-by-24-inch base, spacing them evenly in a triangle pattern away from the outer edges. Flip the base over, pre-drill two pilot holes at each post location, and countersink them so screw heads sit flush. Drive 3-inch wood screws through the bottom of the base into each post.
- 4
Wrap the main post tightly in sisal rope
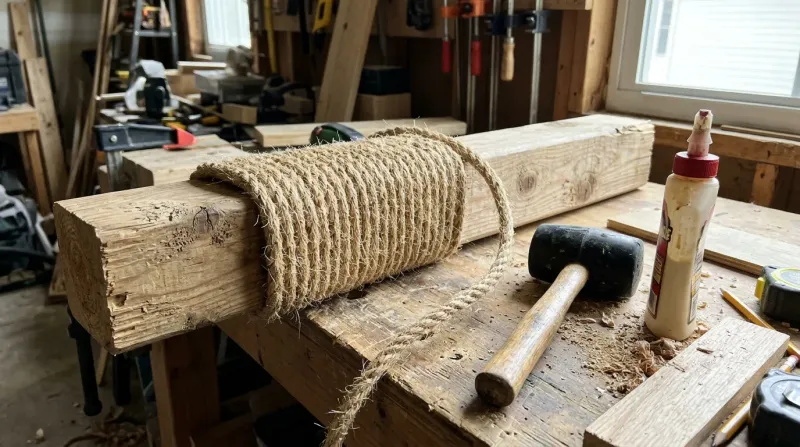
Using the 100-foot coil of 3/8-inch natural sisal rope (which covers the 36-inch main scratching post), apply a dab of non-toxic wood glue near the bottom of the 36-inch post and press the rope end into place. Wrap the rope tightly around the wood, tapping each row downward with a rubber mallet so no gaps show. Secure the top end with more glue and let it dry completely, leaving the two shorter posts bare or wrapped only if you purchase an additional 120 to 150 feet of rope.
- 5
Cover the platforms with soft carpet
Cut low-pile carpet or plush fleece pieces 2 inches larger than each platform on all sides. Lay the fabric face down, center the plywood on top, trim excess bulk at the corners so folded layers do not stack too thickly, and fold the edges over neatly like wrapping a gift. Pull the fabric tight and secure it underneath using 1/2-inch or 9/16-inch heavy-duty staples for carpet (or 3/8-inch staples for thinner fleece) spaced every 2 inches.
- 6
Mount the platforms onto the posts
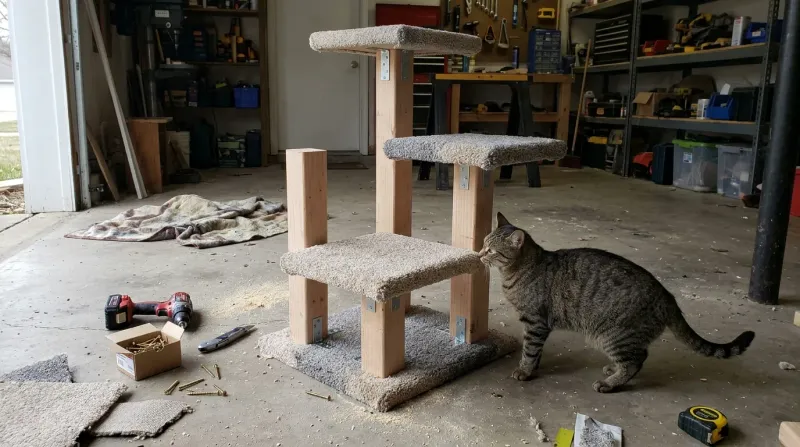
Center the 12-by-12-inch platform on the shortest post, the 16-by-16-inch platform on the middle post, and the 14-by-14-inch platform on the tallest post. Rather than driving screws straight down through the carpet into post end grain, attach each platform from underneath using pocket holes drilled into the top of the posts, countersunk wood screws driven upward through the underside of the plywood before stapling the carpet over them, or heavy-duty metal corner brackets underneath.
- 7
Inspect stability and test every joint
Place the finished tower on a flat floor and push firmly against the top platform from multiple directions to check for tipping or sway. Run your hands over all carpet edges and rope ends to verify no sharp staples, splinters, or loose threads are exposed before letting your cat explore their new tower.
Pet-Safe Materials and Stability Tips
Choosing safe materials protects your cat from splinters, toxic fumes, and accidental ingestion. Always buy kiln-dried, untreated pine or spruce lumber rather than pressure-treated outdoor wood, which contains chemical preservatives harmful to pets if chewed or scratched. Select untreated, natural sisal rope instead of synthetic polypropylene rope, and avoid carpet remnants with loose loops that can snag claws.
Stability depends on weight distribution and fastener placement. Keep the bottom plywood base at least 24 inches wide, and place your tallest post near the center or back rather than right on the front edge. If you have heavy breeds like Maine Coons or multiple cats that chase each other up furniture, check out these cat trees for large cats for extra reinforcement ideas, or anchor the top platform to a wall stud with an L-bracket.
Budget Variations and Easy Alternatives
You can customize this basic three-tier frame to fit small apartments or tight budgets. Instead of buying full rolls of sisal rope for every post, wrap only the main vertical trunk and cover the platforms with remnant low-pile carpet tiles attached with heavy-duty staples. For a rustic look, replace milled 4x4 posts with fallen hardwood branches that have been positively identified as non-toxic to cats (avoiding toxic species like cherry, walnut, or yew), stripped of bark, thoroughly dried and baked or sanitized to eliminate wood-boring insects, fungal spores, and mold, sanded smooth, and leveled flat on both ends.
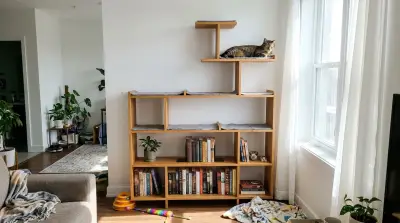
If you lack power tools or floor space, consider simple household alternatives that still satisfy climbing instincts. Clearing the top of a sturdy bookcase, adding non-slip mats to window perches, or exploring cat tree bookshelf ideas gives indoor cats vertical territory without building a freestanding tower from scratch.
Building your own cat tree takes roughly three hours and gives your pet a durable, custom-fitted climbing tower without flimsy particleboard parts. Check the screws and sisal wrap every few months to tighten any joints that loosen from daily leaps, and swap out worn rope whenever your cat shreds through a section.
Frequently asked questions
Is it cheaper to build your own cat tree?
Building a cat tree typically costs between $75 and $120 in new lumber, plywood, carpet, fasteners, and sisal rope (though using scrap wood and leftover carpet can lower the cost), which is still cheaper than buying a solid-wood commercial tower of similar height. You also save money long-term because you can replace worn sisal rope yourself instead of throwing away the whole tree.
What kind of wood is safe for a DIY cat tree?
Use kiln-dried, untreated pine, spruce, fir, or birch plywood for indoor cat furniture. Never use pressure-treated lumber, cedar, or chemically stained wood, as the preservatives and natural oils can irritate your cat's paws or cause illness if chewed.
How do you keep a homemade cat tree from tipping over?
Make the bottom base at least 24 inches wide using thick 3/4-inch plywood, and keep taller posts positioned near the center rather than right on the edge. For tall towers or large cats, secure the highest platform to a wall stud using a metal L-bracket.
Can I use hot glue to attach sisal rope on a cat tree?
You can use hot glue to tack down the starting and ending coils of sisal rope, though non-toxic wood glue holds up better over time. Always press the rope coils tightly together with a mallet and tuck stray glue strings away so your cat does not chew them.

Nathan Brooks
Nathan Brooks runs Farmingzoom to help loving pet owners create safe, enriching homes for their animals. He cares deeply about responsible pet care and focuses on making everyday decisions simpler for fellow owners.…