Time needed
4 h
What you need
- Two 4x8-foot sheets of 3/4-inch birch plywood
- One 2x2-foot sheet of 1/4-inch birch plywood
- 50-foot roll of pre-glued birch iron-on edge banding
- 100 feet of 3/8-inch untreated natural sisal rope
- 1 1/4-inch coarse-thread pocket-hole screws
- Non-toxic PVA wood glue
- Zero-VOC water-based matte polyurethane
- Four 4-inch tapered wooden furniture legs with mounting plates
- Heavy-duty steel L-bracket with wood screws (plus drywall anchors if a stud is unavailable)
- Non-slip washable felt or synthetic low-pile carpet tiles with hook-and-loop tape
Tools
- Circular saw or track saw
- Jigsaw with fine wood-cutting blade
- Cordless drill and driver bits
- Pocket-hole jig
- Orbital sander with 120, 220, and 320-grit sandpaper
- Household clothes iron
- Heavy-duty staple gun
- Bar clamps and stud finder
You can build a sleek, mid-century wooden bookshelf that gives your cat vertical climbing territory without ruining your living room decor. Standard beige carpeted towers stick out like sore thumbs in open-concept homes, collect stubborn pet hair, and wobble when energetic cats launch onto them.
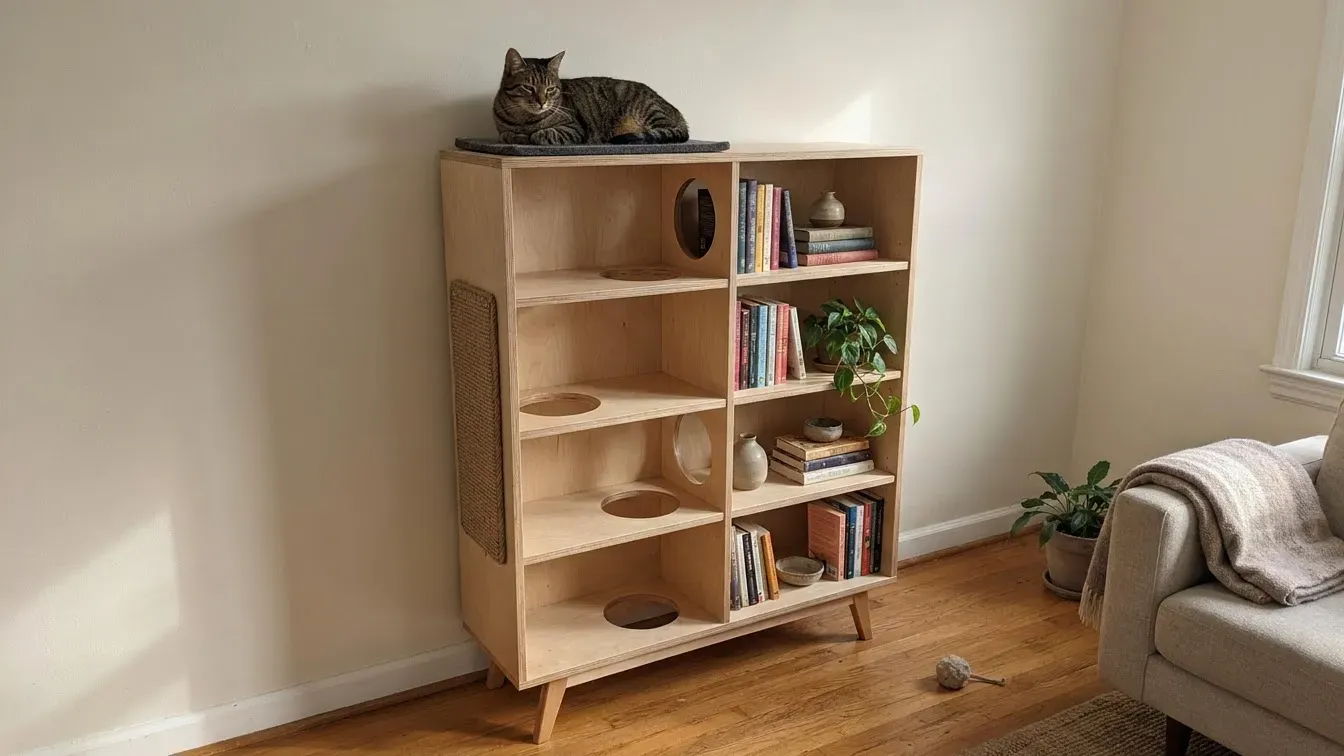
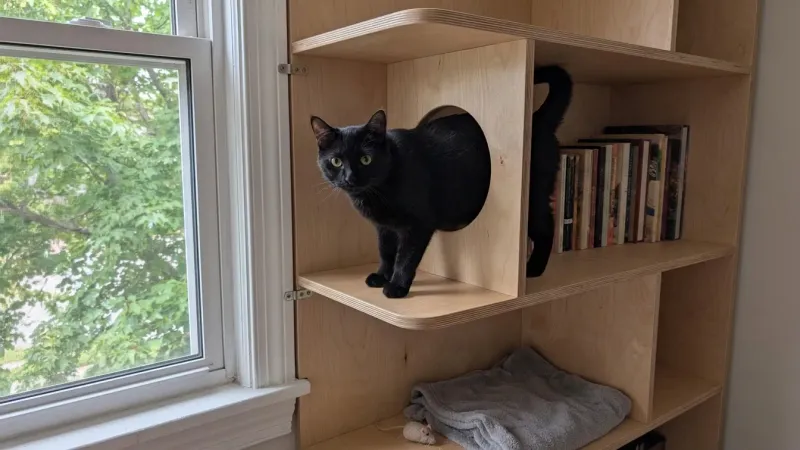
Using finished birch plywood, clean pocket-hole joinery, and surface-mounted sisal scratching panels, this 64-inch-tall shelving unit blends right into your entertaining area. It holds your books, framed photos, and safe decor on one side while offering staggered jumping ledges, a cozy lower hideaway box, and a sunlit top perch for your cat.
- 1
Plan the Dimensions and Cut Your Plywood
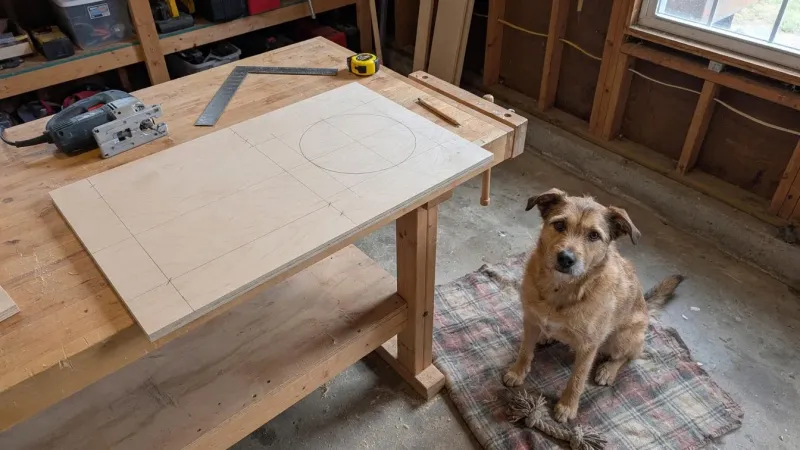
Measure your wall space and cut 3/4-inch birch plywood into two vertical side panels measuring 64 inches tall by 14 inches deep. Cut five horizontal shelves at 28 inches wide by 14 inches deep, plus two vertical divider panels measuring 15 inches tall by 14 inches deep to create staggered climbing levels and a lower cubby. Having a hardware store make these straight cuts saves time and guarantees square edges.
- 2
Cut Staggered Cat Access Holes
Trace an 8-inch-diameter circle on the left side of the second shelf and the right side of the fourth shelf using a compass or mixing bowl. Drill a 1/2-inch starter hole inside each circle, then insert a jigsaw blade and cut out the openings smoothly. Staggering the holes left to right encourages cats to climb upward in a natural zig-zag pattern while leaving the opposite sides open for books.
- 3
Sand All Surfaces and Apply Edge Banding
Iron pre-glued birch wood veneer edge banding onto all exposed plywood edges and trim the excess flush with a utility knife or edge trimmer. Sand every panel, shelf, and circular cutout with 120-grit sandpaper followed by 220-grit sandpaper until the wood feels silky smooth. Careful sanding prevents splinters in delicate paw pads and gives the finished bookshelf a true store-bought furniture appearance.
- 4
Drill Pocket Holes on the Undersides
Set your pocket-hole jig for 3/4-inch material and drill two pocket holes at each end of the underside of every horizontal shelf and vertical divider. Placing the pocket holes underneath keeps all screws completely hidden from eye level once the unit stands upright. Vacuum away all sawdust before assembling so wood glue bonds cleanly.
- 5
Assemble the Outer Frame and Staggered Shelves
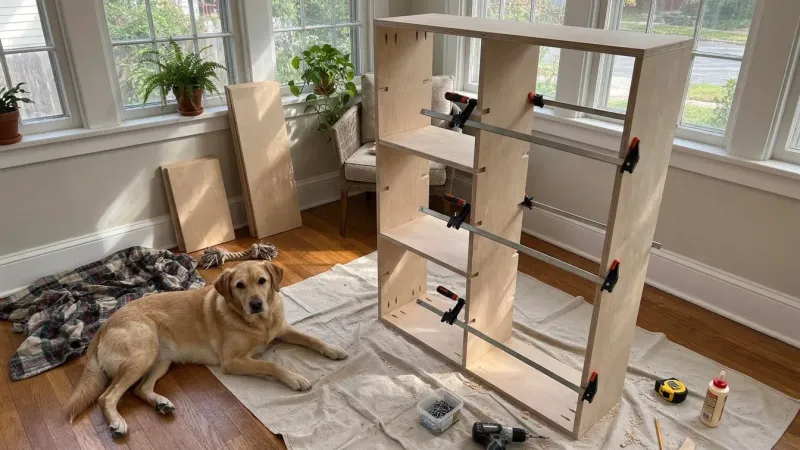
Lay the two 64-inch side panels flat on your workspace and attach the top and bottom shelves flush with the ends using wood glue and 1 1/4-inch coarse-thread pocket-hole screws. Space the three interior shelves 15 inches apart vertically, securing them with clamps before driving in the screws. Insert the two 15-inch vertical dividers off-center between the lower shelves to form a private cat condo on the bottom left and book cubbies on the right.
- 6
Install Surface-Mounted Sisal Scratching Panels
Cut a 1/4-inch plywood backing strip to 28 inches tall by 10 inches wide to fit neatly along the lower exterior side panel. Wrap 3/8-inch untreated natural sisal rope tightly around the strip, securing every fifth coil into the front face with 1/4-inch heavy-duty staples and non-toxic PVA wood glue so the rope coils completely cover the staples. Fasten this finished surface-mounted framed panel onto the side of the bookcase with screws so your cat gets a tall vertical scratcher that stays neatly framed in wood.
- 7
Apply a Pet-Safe Finish and Attach Base Legs
Coat the entire wooden structure with two thin layers of water-based, zero-VOC matte polyurethane, sanding lightly with 320-grit sandpaper between coats. Let the finish cure for at least 48 hours until completely odor-free. Screw four 4-inch mid-century tapered wooden furniture legs into metal mounting plates at the bottom corners to lift the unit off the floor for easy vacuuming.
- 8
Anchor to the Wall and Add Grip Cushions
Position the finished bookshelf against your living room wall and secure the top shelf directly into a wall stud using an L-bracket and wood screws (or heavy-duty drywall anchors only if a stud is unavailable) so heavy leaps never tip the unit. Attach non-slip washable felt or synthetic low-pile carpet tiles to the top perch and interior jumping platforms using hook-and-loop tape. For more ways to integrate feline perches into living areas, browse these cat tree bookshelf ideas for home storage.
Safety and Pet-Friendly Material Choices
Cats chew on wood edges and lick their paws after walking across shelves, so every material on this build must be pet-safe. Choose pure, unoiled sisal rope or woven sisal fabric rather than sisal treated with chemical flame retardants or oils. Avoid cedar or pressure-treated lumber, as their natural resins and chemical preservatives irritate feline skin and respiratory tracts.
Keep your decor safe for curious climbers by placing heavy ceramic vases or toxic houseplants like lilies, pothos, and philodendrons in another room. If you want greenery on your new shelves, stick to verified non-toxic plants such as spider plants or Boston ferns, and secure heavier books with sturdy bookends so they cannot topple onto your cat.
Adapting the Build for Multi-Cat Homes and Senior Pets
If you share your home with two or more cats, add a second exit hole to the bottom hideaway cube so one cat can never corner another inside. For larger breeds like Maine Coons or Ragdolls, widen the shelf depth from 14 inches to 18 inches and double up the 3/4-inch birch plywood or add center support braces for extra rigidity, much like the structural setups in our guide to building a sturdy DIY cat tree for heavy cats.
Senior cats or pets with joint stiffness need shorter vertical leaps than 15 inches. Add an extra intermediate step shelf spaced 9 to 10 inches apart, and attach low-pile, removable carpet tiles onto every wooden platform using heavy-duty hook-and-loop tape or double-sided carpet tape so they remain removable and washable and older paws never slip when jumping down.
Building your own wooden cat bookshelf takes about four hours of active work and costs far less than designer boutique pet furniture. By combining solid birch plywood, concealed joinery, and framed sisal panels, you give your cat an enriching vertical playground while keeping your living room clean, cohesive, and welcoming for guests.
Sources: ASPCA · International Cat Care
Frequently asked questions
Is it cheaper to build your own modern cat tree than buying one?
Yes, building a custom wood cat bookshelf typically costs between $110 and $160 in plywood, hardware, and sisal rope. Comparable solid-wood or birch furniture-grade cat towers sold online regularly retail for $350 to $700, saving you well over half the retail price.
What existing furniture can I convert instead of building from scratch?
You can convert a sturdy solid-wood cube organizer, an open ladder shelf, or a wide vintage bookcase into cat furniture. Simply cut 8-inch pass-through holes between levels, attach washable grip pads to the slick shelves, wrap one upright post in sisal rope, and anchor the frame to a wall stud.
How do I keep a wooden cat bookshelf from sliding or tipping?
Always anchor the top frame directly into a wall stud using a heavy-duty L-bracket and 2 1/2-inch wood screws. Placing heavy hardcover books on the bottom shelves also lowers the center of gravity so energetic cats cannot shift the structure when launching off the top perch.
What wood finish is safe if my cat chews or licks the shelves?
Water-based, zero-VOC polyurethane or pure food-grade mineral oil are safe once fully cured. Avoid oil-based stains, lacquers, or finishes containing heavy metal driers, and let the wood air out for at least 48 hours before letting your cat climb on it.

Nathan Brooks
Nathan Brooks runs Farmingzoom to help loving pet owners create safe, enriching homes for their animals. He cares deeply about responsible pet care and focuses on making everyday decisions simpler for fellow owners.…