Time needed
3 h 30 min
What you need
- 1 main fallen hardwood branch (3 to 5 inches thick, 4 to 5 feet tall)
- 2 secondary fallen hardwood branches (2 to 3 inches thick)
- 1 half-sheet of 3/4-inch interior cabinet-grade or formaldehyde-free (NAF/CARB Phase 2) birch or maple plywood (at least 24 by 48 inches, or a 4-by-4-foot sheet, for the base and three perches)
- 50 to 100 feet of 3/8-inch untreated natural sisal rope
- Low-pile carpet scraps or heavy fleece for perches
- Three 3.5-inch galvanized lag bolts with flat washers
- 4-inch structural timber screws, plus recessed lag bolts with washers or metal brackets/cleat screws for perches
- Heavy-duty 3/8-inch or 1/2-inch staples
- White vinegar for surface wood cleaning
- Food-grade mineral oil (optional wood conditioner)
Tools
- Drawknife, putty knife, or stiff wire brush
- Miter saw, circular saw, or sharp hand saw
- Cordless drill with wood drill bits and countersink bit
- Socket wrench
- Orbital sander with 80-, 120-, and 180-grit sandpaper
- Heavy-duty staple gun
- Rubber mallet
- Clamps and sawhorses
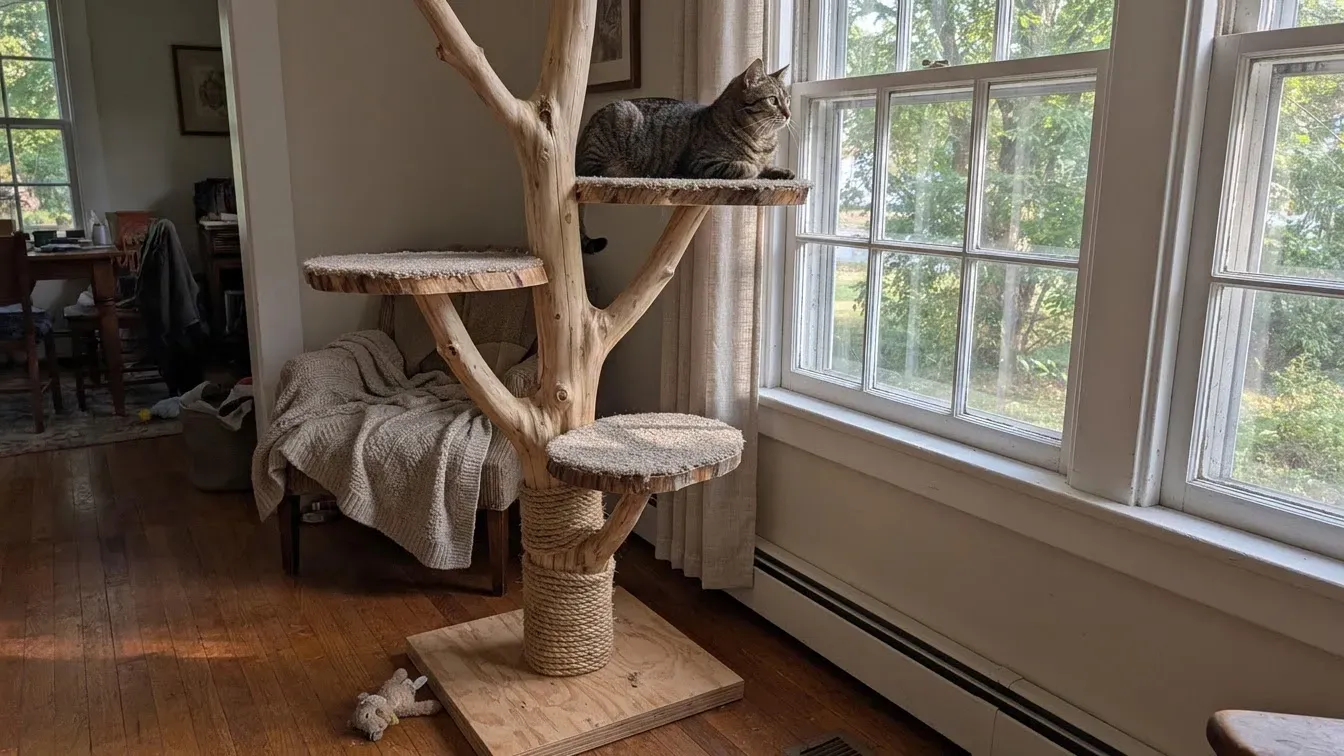
You can build a sturdy, custom indoor climbing tower using fallen timber from your property for a fraction of the price of store-bought furniture. Turning natural yard wood into safe feline furniture requires identifying pet-toxic tree species, stripping loose bark, drying out moisture, and balancing irregular limb angles over a heavy base.
Unlike uniform dimensional lumber, crooked branches shift their center of gravity as they rise. Following a structured wood-prep and anchoring process keeps pests out of your home and prevents the finished tower from tipping when heavy cats leap onto upper perches.
- 1
Select Pet-Safe Fallen Hardwood Limbs
Walk your property after a windstorm and gather solid, rot-free hardwood limbs such as maple, birch, apple, or aspen. (Oak can also be used, though it contains tannins and should only be used if completely stripped of bark, thoroughly dried, and kept away from cats that chew wood.) Verify every branch against the ASPCA toxic plant list before bringing it near your home. Strictly avoid cherry, plum, peach, yew, walnut, red maple, and cedar, as their wood, bark, or resins can harm cats who chew or scratch them. Pick one primary trunk 3 to 5 inches thick with a natural Y-fork, plus two secondary limbs 2 to 3 inches thick.
- 2
Strip Bark and Sanitize the Wood
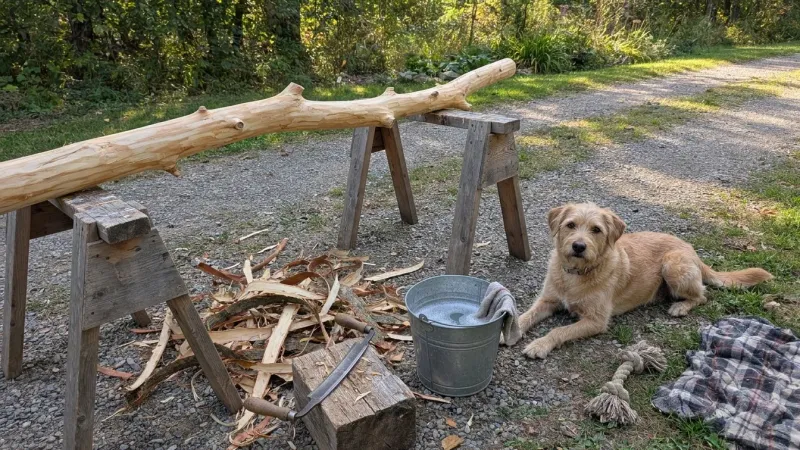
Remove all bark using a drawknife, dull hatchet, or stiff wire brush so beetles, carpenter ants, and fungal spores cannot hitchhike indoors. Inspect the bare wood carefully for active insect bore holes, frass, or rot—discarding infested limbs—since diluted white vinegar only cleans surface dirt and mild mildew and will not kill deep wood-boring larvae or internal mold spores. Scrub the surface with a solution of 1 cup white vinegar per gallon of warm water, then rinse thoroughly with a garden hose. Bake smaller pieces in a low oven (around 200°F for 1 to 2 hours) to eradicate internal pests, or season larger green limbs in a dry, well-ventilated shed for several months (and at least two to three weeks for already-seasoned deadwood) until the wood feels completely dry and lightweight.
- 3
Sand Splinters and Rough Knots Smooth
Clamp each dried branch onto sawhorses and smooth the surface with 80-grit sandpaper on an orbital sander to knock down sharp stubs, burrs, and splinters. Follow up with 120-grit and 180-grit paper to leave a clean, paw-safe finish. If you want to enrich the natural grain without risking chemical toxicity, rub a thin coat of food-grade mineral oil or pure beeswax into the wood and buff it dry with a clean rag.
- 4
Cut Level Bottoms and Build the Base
Cut a 24-by-24-inch square from three-quarter-inch interior cabinet-grade or formaldehyde-free (NAF/CARB Phase 2) birch or maple plywood so the base weighs enough to anchor crooked limbs without the high-emission glues or rough veneers of exterior-grade panels. Stand your main branch on the board, mark the angle where it meets the floor, and slice the bottom dead flat with a miter saw or hand saw. Test the upright balance on the plywood until the branch stands level without leaning past the base edges.
- 5
Anchor the Main Trunk With Lag Bolts
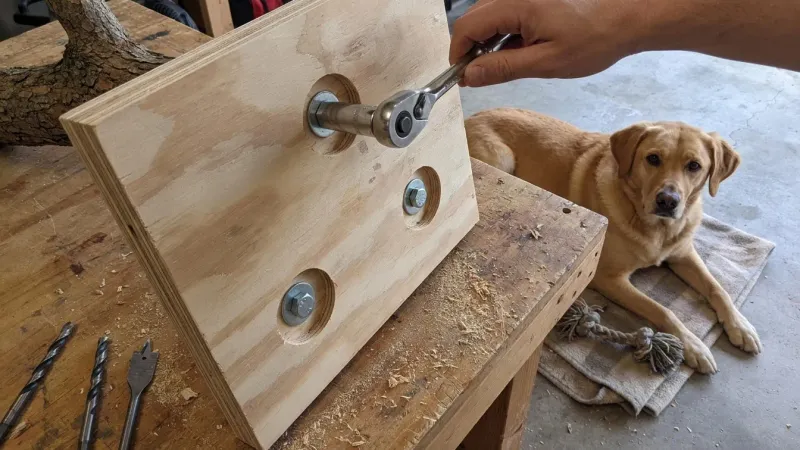
Mark the trunk footprint near the center of your plywood base, keeping heavy upper forks aimed directly over the middle of the board. Drill three pilot holes upward through the underside of the plywood into the center of the trunk. Countersink the underside holes so bolt heads sit flush against your floor, then drive 3.5-inch galvanized lag bolts with flat washers deep into the wood using a socket wrench.
- 6
Join Secondary Limbs and Level Platform Tops
Attach your two smaller branches to the main trunk and base to create secondary climbing routes and triangular bracing. Predrill angled pilot holes and fasten limbs together using 4-inch structural timber screws. Saw the top ends of your upright branches completely flat and horizontal so resting platforms sit level without wobbling under a jumping cat.
- 7
Mount and Upholster the Perch Platforms
Cut three resting platforms—ranging from 12-by-12 inches to 16-by-16 inches—from the remaining portion of your larger plywood panel (such as a 24-by-48-inch half-sheet) and sand all sharp corners round. Rather than relying solely on 2.5-inch wood screws driven straight down into the branch end grain—which can split the wood and loosen under a jumping cat—attach underside plywood cleats or metal corner brackets to each platform, or counterbore recessed holes for lag bolts and washers before upholstering. Wrap each platform tightly in low-pile loop-free carpet scraps or heavy fleece, securing the fabric underneath with a heavy-duty staple gun, and fasten the brackets or recessed lag bolts securely to the flat branch tops.
- 8
Wrap Scratching Zones in Natural Sisal Rope
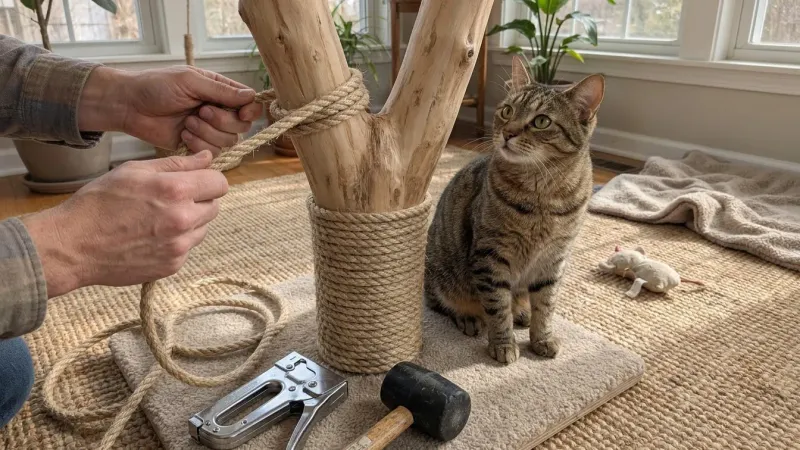
Give your cats dedicated vertical scratching posts by wrapping 12-to-18-inch sections of the lower trunk in three-eighths-inch untreated sisal rope. Anchor the starting tail with a stainless-steel staple, coil the rope tightly upward without gaps, and tap each row snug with a rubber mallet. Secure the top end with two staples tucked neatly between the rope fibers so claws never snag on metal.
Common Wood Prep Mistakes to Avoid
Bringing outdoor timber straight into a living room causes avoidable hygiene and safety issues. Skip these three shortcuts during your build:
- Using unseasoned green wood: Freshly snapped branches hold high internal moisture that causes severe cracking, warping, and indoor mold growth as the wood dries in heated air.
- Leaving loose bark intact: Bark flakes onto carpets, hides wood-boring beetles, and traps moisture against the sapwood.
- Applying toxic sealers or stains: Cats chew on wood and lick their paws after scratching. Never use oil-based stains, polyurethane, or pressure-treated scrap lumber; stick to food-grade mineral oil or raw sanded hardwood.
Adjusting the Design for Large Cats or Kittens
Tailor your perch spacing and base footprint to match the size and mobility of your household pets. If you share your home with breeds over 12 pounds, follow the structural principles in our guide on how to build a sturdy DIY cat tree for large heavy cats by widening the base to at least 28 by 28 inches and selecting main trunks at least 4 inches thick.
For young kittens or senior cats with stiff joints, keep vertical jumps between platforms under 14 inches and wrap every horizontal limb in thick carpet or sisal so claws can grip reliably during descent.
Give the finished tower a firm sideways shove before introducing your pets; if the base lifts, add a wider plywood sub-base or sandbag weight underneath. Place the tree near a sunny window and sprinkle dried catnip on the perches to encourage immediate climbing and scratching. For more ways to save on feline furniture, check out our guide on how to build a sturdy DIY cat tree on a budget.
Sources: ASPCA · International Cat Care
Frequently asked questions
Can I use pine or cedar branches for a DIY cat tree?
Avoid cedar and fresh sap-heavy pine branches. Cedar contains aromatic oils and phenols that can irritate a cat's respiratory tract and skin, while sticky pine sap clings to fur and causes stomach upset if ingested during grooming. Stick to dry, sap-free hardwoods like maple, birch, apple, or aspen (or completely debarked, thoroughly dried oak if your cats do not chew wood).
How do I get bugs out of tree branches for a cat tree?
Strip all bark completely first and inspect closely for active bore holes or rot, as most beetles and ants live beneath or inside the wood. Scrubbing with 1 cup white vinegar per gallon of water only removes surface dirt and mild mildew—to eliminate internal pests and moisture, bake smaller pieces at 200°F for 1 to 2 hours or season larger green limbs in a dry, ventilated shed for several months before bringing them inside.
Is it cheaper to build a real branch cat tree than buying one?
Yes, especially when sourcing fallen timber from your own yard. Using free branches and leftover plywood or carpet scraps typically keeps hardware, sisal rope, and fastener costs between $25 and $55, compared to $150 to $400 for commercial real-wood cat trees of similar height.
How thick does the base need to be so a real branch cat tree will not tip?
Use at least 3/4-inch plywood cut to a minimum footprint of 24 by 24 inches for average cats, or 28 by 28 inches for large breeds. Keep the heaviest upper branch forks centered directly over the middle of the base rather than overhanging the edges.

Nathan Brooks
Nathan Brooks runs Farmingzoom to help loving pet owners create safe, enriching homes for their animals. He cares deeply about responsible pet care and focuses on making everyday decisions simpler for fellow owners.…